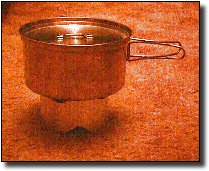
If you are like me and you don't have a whole lot of money to shell out on gear and / or you like to make your own gear, then this page might be for you. All in all, this stove and pot stand didn't cost me a red cent to make other than having to buy the tomato paste cans, pop can, and stove pipe -- which we already had around the house. The stove was designed to hold no more than 1/4 cup fuel and the pot stand was designed to hold a minimum of 4 cups of water plus a covered pot. That should be more than enough to boil water and cook food on any backpacking trip. When completed, the stove will weigh approximately 1 oz (not including the fuel) and the pot stand should weigh approximately 0.4 oz. That's 1.4 oz total weight for both the stove and the pot stand! As Shaft would say "Can you dig it?! "
This stove design is Version 1.0...design modifications will be made as trail testing takes place. Quite a bit of the field testing will come from the people that take the time to make and evaluate this stove and find the hidden deficiencies in the design. If you feel that a design modification would make this stove work better, please e-mail me at sgraber@bigfoot.com and let me know.
Why use an alcohol stove, you ask? There are many reasons...ease of locating fuel...cost of fuel...etc... The most compelling reason, though, can be found in Roland Mueser's book "Long-Distance Hiking: Lessons from the Appalachian Trail" on page 57. He surveyed 126 thru-hikers after his 1989 thru-hike on the particular type of stove that they used on their journey from Georgia to Maine. The below table summarizes his results:
|
Manufacturer
|
Number of People Using Stove
|
Percent of Total
|
Failure Rate
|
|
Mountain Safety Research
|
59
|
47%
|
15%
|
|
Coleman Peak1
|
26
|
21%
|
8%
|
|
Optimus / SVEA Suunto
|
19
|
15%
|
5%
|
|
Various Butane / Propane
|
12
|
9%
|
17%
|
|
Various Alcohol
|
6
|
5%
|
0%
|
|
None
|
4
|
3%
|
--
|
As can be seen, the data indicates that all of the popular stoves that were used by thru-hikers had failed them at one time or another except for the hikers that used alcohol stoves. They were the only ones that had a stove failure percentage of 0%. All the rest had stove failure rates of between 5 and 17% of the time. No moving parts in an alcohol stove, no need to worry about a stove failure. Makes the most sense for a thru-hiker (or any lightweight hiker) in my opinion...
The original idea for this stove design came from the following URL:
http://www.uvol.com/scouts/stove/stoveUNPC.htm
and from the original Trangia alcohol stove design. The above URL shows a person how to make an alcohol burning stove out of two popcans. This page was created in order to improve on the original design in both durability and efficiency of fuel consumption.
The original idea for the pot stand came from the following URL:
http://members.aol.com/hikenet/ultralightstove.html
The above URL outlines making a home-made hexamine fuel tab stove similar to the Esbit stoves that are available on the market. This website, however, touts their design as being 35% more efficient than the Esbit stove design because of it's superior reflector / flue assembly.
This page is divided up into 7 sub-sections:
- Materials List and Instructions on How to Make the Stove
- Materials List and Instructions on How to Make the Pot Stand
- How to Use the Stove and Pot Stand Together for the first time
- Boil Time Comparison Against a Mini-Trangia 28 stove
- Final Summary
- Stove / Pot Stand FAQ
- Comments from the web community
Detailed instructions and diagrams have been included for ease of creation.
If you have any questions or comments about the stove and / or the pot stand, feel free to e-mail me at sgraber@bigfoot.com and I will return your e-mail as soon as I can. I would also greatly appreciate hearing about how the stove performed "in the field." I have done some field testing myself and have found that it works very well, but I would also be interested in hearing your experiences with the stove -- especially on long distance hikes (thru hikes of the AT, PCT, etc...). Observations, shortcomings, things you liked about the stove...I'm not picky. It only helps design the next generation of stoves...
I hope that you enjoy making and using the stove and pot stand outlined on this website as much as I did designing and field testing it.
Happy trails!
Shane Graber
Disclaimer: All persons taking on this project do so at their own risk. Care should be exercised when working with all sharp objects and flamable materials.
Copyright 1998, Shaneo's Sites
http://www.fulton-net.com/~sgraber/stove.htm
|